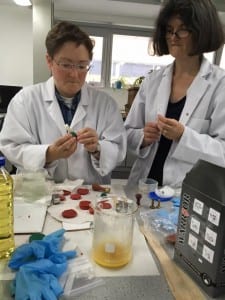
A few weeks ago, members of the Imprint team donned white coats and headed for a laboratory to experiment with making sealing wax and applying seals to documents. The aim was to discover more about the material we are investigating, the physical process of sealing, and how and when prints on medieval seals were created, so that we can better understand and interpret the results of the forensic analysis.
I have made sealing wax on numerous occasions, but usually in my kitchen (be warned that some of the ingredients are flammable or toxic!) and with appropriately medieval disregard for precise measurements, so I was particularly keen to have a clearer idea of exactly what was going on.
So, what did we do, and what did we find out? The principal ingredient of medieval sealing wax is… wax! Beeswax, to be precise: the hard, shiny sticks sold as ‘sealing wax’ are shellac (produced by a beetle native to South East Asia) or an artificial substitute. We used three different sources of beeswax and noticed that this affected the finished product, perhaps explaining why some medieval recipes specify ‘white’, ‘yellow’ or ‘polen’ (particularly high-grade) wax. Resin, usually colophony – Larch – is another key ingredient of most seals, making the wax harder, and pigment was often added.
‘Take a pound of whight wex, and throwe therinne a quartroun of terbentyne […] Thanne loke thou have redy oz. 1 of vermyloun, smal grounde, al so smal as ony poudre’
– BL Sloane 73, f. 173v
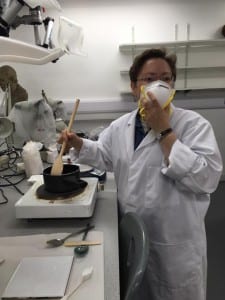
Based on fifteenth-century recipes in Trinity College Cambridge MS R.14.37 and British Library MS Sloane 73, we mixed beeswax, colophony and pigment at a ratio of 16:4:1, and found that it is important to keep stirring enthusiastically to ensure that the ingredients mix correctly. Beeswax starts to become plastic at around 32°C but melts at a much higher temperature, all recipes stating that the resin should then be added but not on direct heat, with pigment added last; our mixture was 69°C when the resin had melted and pigment was added.
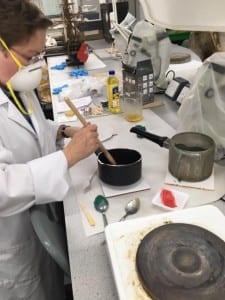
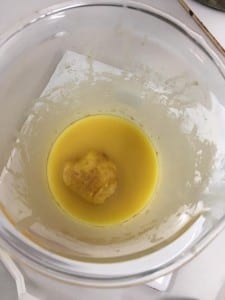
Having ruined one saucepan (only high-tech equipment for us!), we decided to employ a bain marie technique, but found that this does not work – the resin formed a hard ball amid liquid wax.
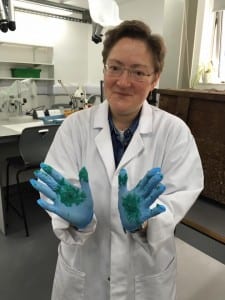
So, armed with a new saucepan, we continued to experiment, adding vermillion (mercury II sulphide) for red wax and verdigris (copper II acetate) for green wax, as specified in the recipes.
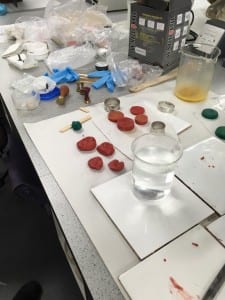
It would have been impractical to go through this process every time a document needed sealing, and sealing wax was prepared in advance and formed into small ‘cakes’. The Trinity College recipe specifies that, when the wax mixture has solidified but is still warm, it should be ‘tossed’ between well-greased hands, rolled into a sausage, and sliced to form cakes. This is messy and fiddly, and during previous experiments I came up with an easier solution: pouring the liquid wax mixture into confectionery moulds.
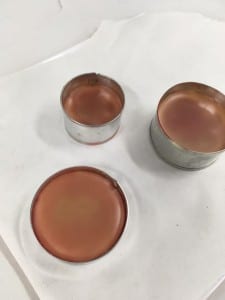
This appeared to work, for although the pigment often sank, leaving the top of the cake pale, the colour generally evened-out when the wax was re-warmed.
However, in the interests of science we decided to follow the specified method, and I confidently scooped up the warm wax mixture. I had, however, neglected another key point, and the wax stuck to my un-greased hands…
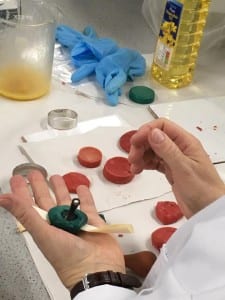
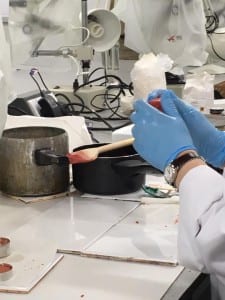
A fresh batch of wax mixture later and with grease (well, cheap vegetable oil) applied, the rolling was underway, and the resulting cakes were a consistent and bright colour throughout – so don’t try the shortcut! It would be interesting to know what types of ‘grease’ were used, and what effect this might have on the consistency and stability of sealing wax.
Once the cakes had cooled and hardened, the next stage was to recreate the process of validatory sealing. Sealing wax can be applied to the face of a document but adheres poorly, and in medieval Britain the principal means of attachment was via a cord or strip of parchment hanging from the document. This requires wax to be moulded around the parchment strip or cord, and there are debates about how this was done. It is sometimes suggested that one wax cake was pressed into the matrix, the cord or parchment strip laid across this, and another cake then moulded over the top. This makes sense if a large matrix is impressed in one side of the wax and a smaller matrix in the other side, since it avoids damaging the impression from the principal matrix while the second is impressed – although Imprint has found several examples of hand and finger prints over the principal impression. A second theory, which from experiments and extant seals I think was most common in England and Wales, is that two cakes were moulded together and the wax disk held while a matrix was impressed. The initial findings of Imprint seem to support this, with numerous examples of clear and relatively deep palm prints on the back of pendant seals.
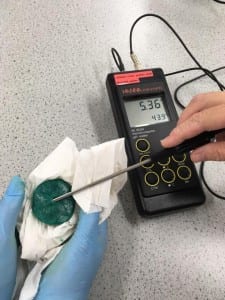
Before the wax is attached it needs to be warm enough to be malleable and take an impression, but not so soft that they it is difficult to handle or sticks to the matrix. I usually warm the cakes in water since beeswax is water-repellent (but they need to be dried carefully to avoid water damaging the parchment, and it is easy to scald your fingers dunking them!), and know from experience how soft the wax needs to be, but ‘this feels about right’ is hardly a scientific benchmark so we used a probe-thermometer for a more precise reading: 43.9°C in the case of our second batch of green wax.
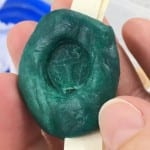
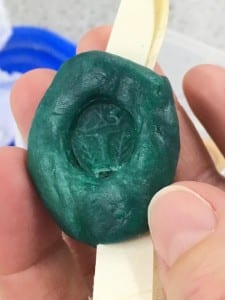
The final stage of the process is to impress the matrix, and it is sometimes suggested that it was powdered or oiled to help with removal from the warm wax. I’m doubtful about the former because I have never seen pitting on an impression which could result from this, and rarely use the latter, but we decided lightly to oil the matrix. Holding the wax carefully on one hand I impressed the matrix with the other, something which takes a surprising amount of pressure. The result was a clear impression of the matrix and, on the back of the wax, visible lines from my palm, just as we so often see on medieval seals.
The experiments confirmed some things we knew, but also provided unexpected insights and led to further questions. Firstly, the process of documentary sealing is a complex one, and benefits from experience. From adding wax to a container and starting to warm it until the sealing wax cakes were cooling on the worktop took approximately fifteen minutes, but we were making very limited amounts and had the advantage of an electric heater. Furthermore, the fumes given off by the ingredients are strong (plus vermillion and verdigris are poisonous), and the preparation of large batches of sealing wax would have been an unpleasant task, perhaps explaining why even small scriptoria and chanceries appear to use quite a lot of similar-coloured wax at certain times. The importance of kneading the cooling wax mixture to ensure a consistent and vibrant colour was something of a surprise, and whether this was done, and for how long, may also be a contributory factor in seals of an inconsistent hue or grainy appearance, although the latter may also be the result of resin not melting properly – as we found out – or pigment not ground finely enough or added too late in the process.
Of perhaps greatest significance for the Imprint project were the final stages of the process, attaching the wax cakes to a document and impressing a matrix.
Although the cakes need to be quite warm when forming the disk, and despite the manipulation of the wax at this stage, there were very few, very faint, prints visible. It was only when holding the wax and exerting enough pressure to create a good impression of the matrix that my prints were clear. I deposit poor-quality prints, and women generally have lower ridge detail than men, but this does suggest that many of the prints we are analysing were made when the matrix was impressed, rather than at an earlier stage. We also found that, despite enthusiastic handling of the wax soon after the matrix had been removed, no further prints appeared to be deposited, again suggesting that those on medieval seals were made during the actual sealing process. Finally, I held the wax in my left hand, orientated with the parchment tag between my thumb and forefinger, because this replicated prints on several seals analysed for the pilot project.
Although it would have been possible for another person to impress the matrix, it is much easier for the same person to hold both wax and matrix. As we analyse more Imprint data we plan further replications of how the wax was held, since this will help us to study the physical process of sealing and its implications for questions of agency, participation in legal and administrative processes, and access to the enacting of power and authority. It will also give us an excuse to spend another fun day in a lab!
Elizabeth New
